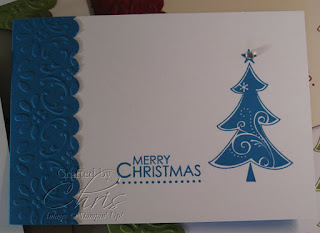
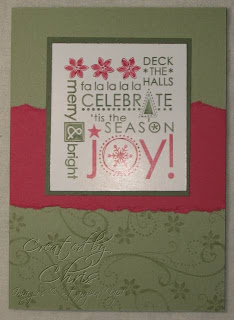
Showing posts with label Season of Joy. Show all posts

Friday, December 23, 2011

A Cardstock Comparison

I'm sure I've posted about this before, but I can't for the life of me recall where it ended up.  Anyway, it bears repeating.

The other day, when I was making my Christmas cards, I was hunting for my stash of Whisper White cardstock (yes, it usually lives in the one place, but I was getting low and thought I might have some squirreled away elsewhere).  I found a handful of white cardstock and naturally assumed it was what I was looking for.

I couldn't have been more wrong, as I discovered when I started to stamp.

Can you see the difference in the picture?

The El Cheapo cardstock is on the left.  The cardstock itself looks very similar to Stampin' Up! Whisper White, but the ink just doesn't soak into the card the same way it does with the SU sample shown on the right.  You can see how patchy the tree looks, especially around the large swirl.


The Whisper White (and Very Vanilla) cardstock from Stampin' Up! have a smooth, smooth, smooth finish which takes ink beautifully.  You might be able to get away with a cheaper card if you are using outline stamps (although, why compromise?), but for bold stamps with large inked areas, you honestly can't go past this stuff.  If you are at all fussy about the finished look of your cards and scrapbooking pages, I can't recommend this highly enough.

You will be pleased to know that I found my hidden cache of Whisper White (and ordered another packet just in case) and my Christmas cards are ink-perfect :-)

Images © 1990-2011 Stampin' Up!®

Supplies used:

Stamp/s: Season of Joy
Ink: Rich Razzleberry

Cardstock: Whisper White, and some cheap stuff I had lying around

Tuesday, December 20, 2011

Countdown to Christmas

With only a few days to go, I thought I had better share my Christmas cards for 2011 ... those of you who saw my previous post will recognise this instantly LOL.  Yes, I CASEd myself again this year - it was hard enough coming up with one design I could mass produce, why would I want to try to think of another?

Actually, I did have another idea, but that never really took off - I decided I was trying too hard, and the finished results didn't look ... well, finished.  I might revisit the idea through the year, however - we'll see how keen I get.

As with the cards I made for my employers, I trimmed each edge with the Scallop Border Punch, and embossed them using the Finial Press Embossing Folder.  This time I used my time-saving tip of putting two through the folder at a time from the start ... you may be able to tell from this closeup that the embossed design doesn't look quite as crisp as you would normally expect - this card uses the bottom of the two embossed sheets.

To dress up the cards a little, I spritzed the front flap with a little of my home made shimmer spray (ie. a few drops of Champagne Mist Shimmer Paint in a little spray bottle with some rubbing alcohol) - it looks pretty and smells nice too!

Images © 1990-2011 Stampin' Up!®

Supplies used:

Stamp/s: Season of Joy
Ink: Rich Razzleberry

Cardstock: Rich Razzleberry, Whisper White
Other: Scallop Edge Border Punch, Finial Press Embossing Folder, Basic Rhinestones, Champagne Frost Shimmer Paint

Saturday, December 17, 2011

Christmas Cards Galore!

Ho, ho, ho.

That's about as merry as it gets around here at this time of year.  I find myself not feeling terribly Christmassy until the very last minute (although for a wonder I have actually finished all the gift buying early - I know, I couldn't believe it either!).

Each year, I have been asked by my employers to make handmade cards to send out to our customers.  It's only a small company, but that's still in excess of 100 cards - *phew*.  I almost didn't do it this year, as I was a little burnt out after making 100 of these (which I really liked, but not after the first forty or so).  But at the last minute I remembered that our customers have enjoyed these cards in the past, they have come to kind of expect it, and I get paid for my efforts :-)

So without further ado, here is this year's effort.  This isn't all the cards - but you get the idea.  As you can see, I've revisited an old favourite, Season of Joy - still available in this year's catalogue (but sure to retire next year).  It really is a great set, with enough stamps to create quite a variety of looks.  I added a rhinestone to the star of each, just for a little extra "wow".

 I made some in Old Olive, some in Pacific Point, and some in Cherry Cobbler (however I teamed the Cherry ones with Very Vanilla rather than Whisper White - love the "vintage" look those to have when they're together.

The cards were a snap to make ... I quickly worked out that I could get three bases out of a sheet of A4 by cutting two 19 x 10.5cm strips from one end, then flipping it 90 degrees and trimming the remaining piece down to 19 x 10.5cm.  Each strip was then scored at 14.8cm, leaving a 4.2cm flap for the front.  Then I just stuck A6 pieces of Whisper White or Very Vanilla behind the (decorated) flaps.

And here is a closeup of one of the cards.  As you can see, I used my Scallop Edge punch down the edge of the flap, and dressed it up by embossing that section with the Finial Press Embossing Folder.  After a time I realised I could put two pieces through the Big Shot at a time - the second piece wasn't embossed quite as deeply, but looked perfect anyway.  Unfortunately, I didn't work this out until I was on the last 18 or so LOL.


Anyway, they all went out in the mail on Friday, and I have already had a couple of comments from the customers - feedback is a wonderful thing!

And in case you're wondering, here are links to Christmas 2009's cards for work, and 2008's as well.  Next year I'm going to start early.  No, honest.

Images © 1990-2011 Stampin' Up!®

Supplies used:

Stamp/s: Season of Joy
Ink: Old Olive, Pacific Point, Cherry Cobbler

Cardstock: Old Olive, Pacific Point, Cherry Cobbler, Whisper White, Very Vanilla
Other: Scallop Edge Border Punch, Finial Press Embossing Folder, Basic Rhinestones

Thursday, January 13, 2011

Christmas Gift Card holders, #3

The third and final of the Christmas gift card holders I made for my nieces and nephew. You can see the first and second here and here.

This time I got a little more creative than I had expected - what was supposed to be a simple slide-out design ended up taking a little longer than I thought. My first few attempts were cast aside as I toyed with different ideas.

In the end, I think I did well. The front and back are cut from the Top Note die, with the front being put back through using the Square Lattice embossing folder (available now in the Summer Mini Catalogue). Again, I spritzed it with shimmer spray, although it turned out to be a little more heavy-handed than I wanted.

Rather than just stick the two die cut pieces together, with a sliding card inside, I decided that they needed to have a little room between the two layers, so I stuck narrow pieces of cardstock at the top, bottom and left hand side to create a gap for the insert. Unfortunately I didn't take a photo of this step, but you can take my word for it that it made the operation of the card holder that little bit easier.

The insert is simply a piece of Daffodil Delight cardstock with a slit cut in the left hand side to accommodate the gift card, with the Round Tab punch attached to the side.

Supplies used:
Stamp/s: Season of Joy
Ink: Old Olive
Cardstock: Melon Mambo, Old Olive, Daffodil Delight, Whisper White

Other: Frost White Shimmer Paint, Top Note Die, Round Tab Punch, Square Lattice Embossing Folder

Saturday, December 19, 2009

Merry Christmas!

Remember a little while ago I posted a Christmas card I'd made, saying it was fun to make, but a little too involved to mass produce?

I changed my mind *g*.

When I broke it down, it didn't really take so long at all. Cutting out the tree was a bit of a pain, but easy enough to do in front of the telly of an evening, and the rest was a snap to put together. I only made 20 so it wasn't too deadly.

And it saved me thinking of a new Christmas design when I'd already come up with this one!

I've used up some of my free Certainly Celery twill ribbon from the September promotion, as well - how serendipitous that this matched my colour scheme. Or did I choose the colour scheme to match the ribbon? Sometimes it's hard to tell which came first *g*.

I love how the Whisper White craft ink looks almost luminous when stamped on lighter coloured cardstocks (or even medium tone as shown here).

Images © 1990-2009 Stampin' Up!®

Supplies used:

Stamp/s: Season of Joy
Ink: Whisper White, Old Olive, Regal Rose

Cardstock: Certainly Celery, Old Olive, Regal Rose,
Whisper White
Other: 5/8" Certainly Celery Twill Ribbon, Cutter Kit

Saturday, December 5, 2009

Stampin on Candles

I have to admit, the title of this post is something of a misnomer - but it's the easiest way of describing this technique.

You don't literally stamp "on" the candle, rather you stamp onto white tissue paper (the cheap gift wrapping kind), then use your heat gun to fuse it gently into the wax.

The result is effective and yes, you can still burn the candles, although I would recommend removing any paper, ribbon or "bling" that may be attached.

I was inspired by the lovely Simone Bartrum's presentation on "candle stamping" at the recent Melbourne regional Stampin' Up! seminar (as was just about everyone else in the room). She showed us some simply stunning projects using ideas I had never thought of before - check out her blog, she is super-talented.

Images © 1990-2009 Stampin' Up!®

Supplies used:

Stamp/s: Always, Priceless, Live Like You Mean It, Season of Joy
Ink: Regal Rose, Chocolate Chip, Real Red, Not Quite Navy

Other: Sweet Always DSP, 1/4" White Grosgrain Ribbon, Old Olive Stampin' Write Marker

Sunday, November 29, 2009

It's that time of year again!

Yes, Christmas is only just around the corner! Which means that I should have started and finished making my personal Christmas cards by now (as opposed to the ones that I make for my employer) and have them stacked up neatly ready to be mailed out to my friends and family.

Yep, like that's going to happen.

What actually happens is I start thinking about Christmas cards in September, then spend the next two months thinking I have loads of time, until I realise it's late November and I haven't done a damn thing about it. Like about now, f'rinstance.

As I was playing about the other night trying to think of ideas I turned to a fun colour combination which I've been using a bit lately - pink, orange and brown. Or, in Stampin' Up! talk, that would be Pretty in Pink and/or Regal Rose, Pumpkin Pie and Chocolate Chip. And teamed with my favourite Christmas set, Season of Joy, I've come up with something a little different from the traditional holiday card.

The orange layer gave me the most trouble - it just wasn't working originally until I trimmed it down a little and added the stamped swirls. The edges have been distressed using the little distresser tool from the Cutter Kit, then dragged through the Pumpkin Pie inkpad and sponged until the colour depth around the edges looked "right".

I don't know that I'd mass produce this card - cutting out the tree is awfully fiddly - but it was fun to make!

Images © 1990-2009 Stampin' Up!®

Supplies used:

Stamp/s: Season of Joy
Ink: Whisper White, Pumpkin Pie, Regal Rose

Cardstock: Regal Rose, Pretty in Pink, Pumpkin Pie,
Whisper White
Other: 5/8" Chocolate Chip Grosgrain Ribbon, Cutter Kit, Stampin' Dimensionals

Saturday, December 20, 2008

Gift Cards

It's that time of year again, when I run out of ideas for what to get for my brother's three kids. So as usual it comes down to gift cards so they can get what they *really* want.

This year we are going to see my brother's family before Christmas so today has been a bit of a rush to get stuff done before tomorrow. Yeah, I've known about it for a few weeks, but the last minute rush is traditional this time of year. If it wasn't for the last minute I'd never get anything done!

The problem with giving gift cards is making them look interesting. After all, they're nothing more than a little piece of plastic, no matter how pretty the pictures are. The solution - make cute little folders to put them in! I used instructions which are found on many websites to create these. Simply cut a strip of cardstock 4-1/2 by 11 inches (I was following US instructions), then score at 3, 5-1/2 and 8 inches. Fold into a W shape and stick the middle bits together at the sides and bottom. Use the Word Window punch to cut a slot out of the centre piece (and punch an extra bit out with a circle punch if you like) and there you have it.

And would you believe I forgot to take a photo of the inside ... if I remember I will sort that out tomorrow and put it up. Duh.

Stamp sets: Season of Joy (no longer available, sorry!)
Ink: Pretty in Pink, Rose Red, Soft Sky, Not Quite Navy, River Rock, Old Olive
Cardstock:
Pretty in Pink, Rose Red, Soft Sky, Not Quite Navy, River Rock, Old Olive, Whisper White
Other: Word Window Punch, 1-3/8" Circle Punch Stampin' Dimensionals

Just for comparison, here's two of the holders I made last year, using a nifty little pattern found here ... how clever and cute is that?

Stamp sets: Bud Basics, Looks Like Spring
Ink: Bashful Blue, Certainly Celery, Regal Rose, Basic Black

Cardstock: Bashful Blue,
Pretty in Pink, Whisper White
Other: Corner Rounder, Horizontal Slot Punch

Thursday, November 27, 2008

100 Cards ... continued

Okay, because Blogger refused to cooperate the other day, I couldn't upload a close up of one of the cards I made for work. Rather than scratch my head over it all, I have taken the easy way out and scanned a card for you to see. The colours have come out kind of odd, but that is an issue with the scanner and the expanse of white on the card - something else I am not going to fuss about just now *g*.

Anyway, here it is ... a simple design, easy to mass produce (unless you're like me and accidentally stick a few card fronts on backwards *sigh* - my excuse is it was getting a little late and I was socialising at the time instead of paying attention to what I was doing) yet effective.

I'm gonna miss this stamp set *sniffle*. Only a couple more days to go if you want to buy it!

Images © 1990-2008 Stampin' Up!®. Contact me if you wish to order any of the supplies used to make this card.

Supplies used:

Stamp sets: Season of Joy
Ink: Purely Pomegranate, Wild Wasabi

Cardstock: Wild Wasabi, Purely Pomegranate, Whisper White

Other: 1-1/4" Circle Punch, 1-3/8" Circle Punch, Scallop Circle Punch, 3/16" Corner Rounder punch

Wednesday, November 26, 2008

100 Christmas Cards!

You can imagine how happy I was to get this lot finished! Yep, there are 100 cards in that pile.

I'm quite impressed with myself.

The backstory to this is that when I started at my current place of employment, my friend (who coincidentally is the office manager) told the boss I made handmade cards. The next thing I know, I've volunteered myself to make the Christmas cards to send to our customers.

That was 2004, and our customer base has grown somewhat since then, but now it's become something of a tradition that our cards are handmade.

I hope the customers like these ones. I do (but not quite as much as I did before I made 100 of them *g*).

I've been trying to post a closeup of one of the cards, but Blogger isn't playing nicely today and keeps wanting to insert the picture vertically instead of horizontally, no matter how I try to trick it! So I will keep trying to get that sorted, and in the meantime, the card is very similar to the second card in this post, except instead of cutting out the flower, I punched out a round design (in the interests of speed).

Images © 1990-2008 Stampin' Up!®. Contact me if you wish to order any of the supplies used to make this card.

Supplies used:

Stamp sets: Season of Joy
Ink: Purely Pomegranate, Wild Wasabi

Cardstock: Wild Wasabi, Purely Pomegranate, Whisper White

Other: 1-1/4" Circle Punch, 1-3/8" Circle Punch, Scallop Circle Punch, 3/16" Corner Rounder punch

Saturday, November 15, 2008

'Tis the Season

Since we are in the middle of a fabulous marker promotion, I thought I would use my markers to create another Christmas card using my new favourite Christmas set, Season of Joy (and don't forget that this set is only available until the end of November!)

Here I have used Always Artichoke and Rose Red to colour in the stamp, which kind of highlights certain parts of the stamp.

It's very simple to do ... as the Stampin' Write markers are double ended, simply use the brush tip to colour in - but don't forget to use the *side* of the marker, not the tip - it will give you faster coverage and not damage the tip too much.

Given that colouring the stamp is a little slower than inking with a regular pad, you will find that parts of the image will dry off a little while you're finishing the rest. To remoisten the ink, just give a little "huff" on the stamp - you feel like a bit of a dill, but hold the stamp up to your mouth and huff some warm air onto it. It really does work.

This technique can also be used to omit parts of a design, but you have to make sure your stamp is superclean before you start or you will end up with nasty little ghost images where you don't want them. Yes, I know this from experience *sigh*.

PS do you like my new watermark? I got tired of the old one and decided to make a pretty one. Variety, as they say, is the spice of life *g*.

Images © 1990-2008 Stampin' Up!®

Supplies used:

Stamp sets: Season of Joy
Ink: Mellow Moss

Cardstock: Gloss White, Always Artichoke, Rose Red, Mellow Moss

Other: Stampin' Write Markers in Rose Red and Always Artichoke

Thursday, November 6, 2008

Samples from a workshop

I thought I would share a couple of cards which were made during workshops in October. The hostesses were hoping to get a head start on Christmas cards and with my faithful Season of Joy stamp set I was ready to help out!

As I've said before, this is a really useful set to have if you are making your own cards, because there are enough stamps in there to get quite a few completely different looks without using the same images over and over again.

Firstly is this little card ... I wanted to use colours which were a little left of centre from the traditional red and green, and thought that pink and olive (with vanilla) fit the bill nicely.

I teamed Season of Joy with the So Swirly wheel because they work together so well.

Images © 1990-2008 Stampin' Up

Supplies used:

Stamp sets: Season of Joy
Ink: Old Olive

Cardstock: Pretty in Pink, Old Olive, Purely Pomegranate, Very Vanilla

Other:
1-3/8" Circle Punch, 1-1/4" Circle Punch, So Swirly Stampin' Around Jumbo Wheel, Jumbo Stampin ' Around Handle, Pretty in Pink 1/4" Grosgrain Ribbon

The other card we made is the basis for those 80 cards I have to make for work (which apparently are increasing to 100 ... *sigh* ...). Of course, the mass-produced one is a bit less fiddly in terms of cutting out, but still effective - trust me. You'll see what I mean when I finish them.

Here the flower (I guess it's supposed to be a poinsettia?) has been trimmed and layered onto the green circle then the red scallop. It's a little time consuming but worth the effort when you see the finished card.

I used Purely Pomegranate and Wild Wasabi here as the traditional Christmas red and green with a twist - they look gorgeous together.

Images © 1990-2008 Stampin' Up!®

Supplies used:

Stamp sets: Season of Joy
Ink: Purely Pomegranate, Wild Wasabi

Cardstock: Wild Wasabi, Purely Pomegranate, Whisper White

Other: 1-3/8" Circle Punch, Scallop Circle Punch, 3/16" Corner Rounder punch

Don't forget!! This stamp set (along with all the others in the current Spring Mini) is only available until the end of this month! I would hate for you to miss out, so consider this a friendly reminder *g*. Contact me today!

Monday, September 15, 2008

Catching up

With one thing and another, I've not really found time for stamping or writing this week ... just stuff getting in the way, but that's how it is I guess *shrug*.

To make up for the lack of posts lately, here are pictures of the cards we made at a workshop I ran over the weekend (waves to Melita and her friends - thanks for a fun afternoon!).

Firstly a Christmas card ... well, after all it's only 3 and a bit months away, so now is the best time to start! I forgot to include a brad in the workshop sample (oops, sorry guys) but otherwise it's as seen here.

We used my favourite Purely Pomegranate and another of SU's 2007/08 In Colors, Wild Wasabi. The green of Wild Wasabi is a little more vibrant than seen here, and between this and the Pomegranate, they take the traditional red/green Christmas colour combination and give it a bit of oomph *g*!

Do the sponged edges of the green layer show up? We did that to give the card a little more depth.

Images © 1990-2008 Stampin' Up!®

Supplies used:

Stamp sets: Season of Joy
Ink: Purely Pomegranate, Wild Wasabi
Cardstock: Purely Pomegranate, Wild Wasabi, Whisper White

Other: So Swirly Stampin' Around Jumbo Wheel & Handle, 1-1/4" Circle Punch, 1-3/8" Circle Punch, Stampin' Dimensionals, Stampin' Sponges

The other card we made was similar to the one posted here, except that I didn't have the butterfly from Priceless (because I didn't get the stamp set for my very own until today - at last, I finally got around to buying it for myself!), so we used the side-on butterfly from Garden Whimsy instead.

I also substituted the Regal Rose cardstock and ink for Cameo Coral (not enough of the original colour cardstock on hand - also now rectified with the order I received today *g*). The colours are similar enough to be interchangable here, but when you have them side by side they are very different (if that makes sense ...?). Perhaps you need to see them to compare.

This card is quick and easy but also has a Wow factor to it. Well, that's what I think, anyway *g*.

Images © 1990-2008 Stampin' Up!®

Supplies used:

Stamp sets: Baroque Motifs, Garden Whimsy, Warm Words
Ink: Cameo Coral, Old Olive
Cardstock: Cameo Coral, Old Olive, Whisper White

Other: Basic Black Stampin' Write Marker

Tuesday, August 26, 2008

Season of Joy

That's the name of the stamp set that these images come from, and while it might seem a little early to be thinking of Christmas, the truth is it's only four months away (*yikes*).

It's always a good idea to get a head start if you're planning on making your own Christmas cards - what seemed like a simple enough task early in the year suddenly becomes a last minute nightmare (well, it does if you're somewhat disorganised like myself *g*). So if you were thinking about making your cards this year, now would be a perfect time to start planning your design. If you would like to purchase this stamp set or any of the other lovely Christmas sets in the Idea Book & Catalogue or Summer Mini Catalogue, please contact me today to place your order!

I love a red & green Christmas card as much as anyone, but I rarely make them in that colour combination - perhaps it's because that's what people "expect" and I'd rather not do what people expect me to do *g*. So with that in mind, I played around with a blue theme for this one - I like it.

I've torn the right hand side of the front so that the wheeled inside edge shows through - this is So Swirly, one of my favourite wheels which happens to match this set perfectly!

Images © 1990-2008 Stampin' Up!®

Supplies used:

Stamp sets: Season of Joy
Ink: Soft Sky, Not Quite Navy

Cardstock: Soft Sky, Not Quite Navy, Whisper White
Other: So Swirly Stampin' Around Jumbo Wheel & Handle, Cutter Kit, Stamp-A-Ma-Jig, Stampin' Dimensionals

And just to compare, here's a very "non traditional" version of this layout - just for fun!

Images © 1990-2008 Stampin' Up!®

Supplies used:

Stamp sets: Season of Joy
Ink: Pumpkin Pie, Ruby Red

Cardstock: Pumpkin Pie, Ruby Red, Whisper White
Other: So Swirly Stampin' Around Jumbo Wheel & Handle, Cutter Kit, Stamp-A-Ma-Jig, Stampin' Dimensionals

Wednesday, July 9, 2008

It's beginning to look a lot like Christmas ...

Okay, so it's not really, although it's cold enough outside *g* ... apparently it snowed yesterday in parts of Victoria, and it's not exactly tropical outside today either. Ah well, this is what you get for a Melbourne winter.

And I know Christmas is still more than five months away, but I'm excited because I got a new stamp set - one that I have been eyeing off since I saw it in the US Stampin' Up! mini catalogue last year (actually, I got more than one new stamp set, but I will talk more about the others at a later date).

This set, Season of Joy, will be available to purchase from next month (August) through to November, through Stampin' Up!s mini catalogue promotion.

Anyway, this is my first card from it. In fact, I haven't even had a chance to ink up the other stamps in the set - too much actual paid work to do, and it's also school holidays which means I'm also trying to spend a bit of time with the kids. It was inspired by this one from Splitcoast Stampers ... I liked the simplicity and the effect of smooshing the stamp pad onto white cardstock. You can't tell from the photo, but actually looks kind of like a chalk finish.

And I used my new So Swirly wheel down the right hand side ... this is in the current catalogue, and co-ordinates with the Priceless set, but also with this Season of Joy as well. I love it when sets match together. The wheel was inked up with Versamark because I wanted a really subtle finish, but the effect was a little too subtle - so I dusted over it the Pretty in Pink chalks (matching the Pretty in Pink cardstock and ink).

Images © 1990-2008 Stampin' Up!®

Supplies used: Season of Joy stamp set, So Swirly Stampin' Around wheel, Pretty In Pink and Whisper White cardstock, Pretty In Pink, Basic Black and Versamark ink, Stampin' Pastels, Pretty in Pink ribbon.


Stay posted ... I hope to put up more samples from not only this set but the other two I ordered sometime over the next few days. I love new stuff!

Oh, and did I mention that all stamps from the upcoming Mini Catalogue are (drumroll please) DIE CUT! Yup, no messy trimming, just pop the stamps out and stick 'em on. So easy, so quick.

LinkWithin

Related Posts with Thumbnails