Thursday, December 30, 2010

Christmas Gift Card holders, #1

Each year, I give my brother's kids gift cards for Christmas ... as they get older it's hard to know what they particularly want, so I figure they're better off choosing their own gifts at their own pace. So every year I have to think up a new way of presenting the cards. Luckily there are a ton of ideas out there on the net to be inspired by!

You can see past years' gift card holders here and here.

Here's the first of the three holders I made last week. This one is based entirely on this one I made earlier this year. Because it was for my nephew, I had to restrain myself and not cover it with flower stamps and "pretty" things - lucky the owl fits nicely into this category! In retrospect, I should have put a little Christmas hat on him; sadly I didn't think of that until much later.

Here's a closeup of the owl (click to get a better look). You can also see that I spritzed the background with my Champagne Mist shimmer spray (lovin' this stuff!) (click here for a little more detail about the product, about halfway through the post). You can also see a little of the texture of the cardstock - this is the textured type, available as part of the 12x12 packs of single colour cardstock.

And here's the inside ... you can use Velcro to hold the gift card holder closed, but I prefer self adhesive magnets (you can buy this stuff by the sheet from craft stores).

Supplies used:
Stamp/s: Teeny Tiny Sentiments
Ink: Early Espresso
Cardstock: Pumpkin Pie Textured, Early Espresso, So Saffron, Old Olive, Very Vanilla, Pumpkin Pie

Other: Top Note Die, Two Step Owl Punch, Two Step Bird Punch, 2" x 1-3/8" Oval Punch, Word Window Punch

Monday, December 27, 2010

More bright and happy :-)

I'm still catching up on posting stamping done in early December ... here we have a card made as a thank you for my daughter's Grade Six teacher, who was tremendously supportive throughout the school year.

I used the card made for Liz as a template, and just changed things around a little to suit the things I had on hand (ie. those things I grabbed first).

So instead of a panel up the side, I used a piece of Certainly Celery across the bottom, embossed with the Elegant Lines embossing folder. And I didn't have any "thanks" stamps nearby so did without. Hopefully the message inside made up for that *g*.

Supplies used:
Stamp/s: Printed Petals
Ink: Daffodil Delight, Melon Mambo, Certainly Celery
Cardstock: Daffodil Delight, Melon Mambo, Certainly Celery, Whisper White
Other: Elegant Lines Embossing Folder, Certainly Celery 1/4" Grosgrain Ribbon, 1" Circle Punch, 3/4" Circle Punch, Basic Rhinestones

Friday, December 24, 2010

Bright and happy

Happy Christmas Eve, everyone. My present to you is this - something pretty to look at *g*.

This is a card made for my friend Liz's birthday last month (although I only caught up with her the other night - better late than never).

I wish I could take credit for it, but I totally CASEd the card from the extraordinarily talented Kim at this link, and just added a few touches of my own.

I used theSquare Lattice embossing folder (from the current Summer Mini Catalogue) on a strip of Daffodil Delight cardstock and attached that to the left hand side of the card.

Here's a closeup of the texture on the Square Lattice folder ... I love this one! Perfect for all sorts of looks, including the ever-elusive "masculine" card.

The greeting is from the Level One hostess set Afterthoughts. Those of you who have this set or have seen it in the catalogue will know that there is a little phrase that normally goes under the word "birthday", however when I mounted this set I chose to trim that part of the stamp off and attach it to the side of the block. This way I can get two stamps for the price of one (well, the hostess sets are free, but you know what I mean), and if I want to add the little phrase, it's a piece of cake using my stamp positioner.

The Certainly Celery "bow" is attached using a Mini Glue Dot - these little things are incredibly handy for situations like this, where you have to add a little ribbon or something. The dots come on a roll, and are abour 4.8mm across, perfect for all sorts of uses.

And another rhinestone, just like last time. These things are just so darned cute!

Supplies used:
Stamp/s: Printed Petals, Afterthoughts (Level 1 Hostess Set)
Ink: Daffodil Delight, Melon Mambo, Certainly Celery
Cardstock: Daffodil Delight, Melon Mambo, Whisper White
Other: Square Lattice Embossing Folder, Certainly Celery 1/4" Grosgrain Ribbon, Daffodil Delight 1/4" Grosgrain Ribbon, 1-3/4" Circle Punch, 1-1/4" Circle Punch, 1" Circle Punch, 2" x 1-3/4" Oval Punch, Basic Rhinestones

Wednesday, December 22, 2010

Mmm, roses...

Long time no see! Still too busy to sit down and stamp, although I do need to make some gift card holders for my brother's kids by Christmas day - ah, there's plenty of time, there's still two days to go *g*.

In the meantime, here's a card I made last month and completely forgot to post. My dear friend Pauline was turning *ahem*, so of course I had to use one of her favourite stamp sets to celebrate.

I have also used the Manhattan Flower embossing folder, as it coordinates perfectly with the big rose from Fifth Avenue Floral.

To emphasise the embossed background just a little, I sponged it lightly with some Crumb Cake ink, and also sponged around the edges of the punched-out greeting.

If you look closely, you can see the subtle glitter of Champagne Mist Shimmer Paint spritzed lightly across the central rose.

And as a final touch, I added a self adhesive rhinestone to dot the "I". The rhinestones, along with sticky-backed pearls, are new to the catalogue this year (page 140) - for only $9.50, you get 150 rhinestones or pearls in three sizes (2mm, 3mm and 5mm).

Supplies used:
Stamp/s: Fifth Avenue Floral, Upsy Daisy
Ink: Early Espresso, Versamark, Crumb Cake
Cardstock: Cherry Cobbler, Early Espresso, Very Vanilla
Other: Manhattan Flower Embossing Folder, Clear Stampin' Emboss Powder, Basic Rhinestones, Champagne Mist Shimmer Paint

Monday, December 13, 2010

I'm pretty sure December is the shortest month of the year

... at least that's what it seems like. Wasn't it just the start of December? Now it's suddenly the 13th! Yikes!

Still no stamping here, far too busy with end of year school type things, and all the usual pre-Christmas hype (ie. leaving shopping till the last minute, trying to work out what you're doing on the day, you know how it is), which is a shame because I just took delivery of some new stuff courtesy of the December Frenzy currently running. No time to play until my annual break between Christmas and the new year *sigh*.

Don't forget, until December 29 there are some great bargains to be had, however this is only while the specially priced stocks last. Already three of the markers (Night of Navy, Pumpkin Pie and Bravo Burgundy) have run out and are now only available at their regular price, and some of the other markers are nearing their limit as well.

If you were planning on placing an order for a Christmas present and want to ensure delivery before the 25th, please note that Stampin' Up! have recommended orders be placed prior to the 15th to arrive in time. If you're not in any hurry, no big deal, just contact me any time to place your order!

Thursday, December 2, 2010

December Frenzy!

How exciting does this sound? A frenzy of specials, available from December 1st through to the 29th. Download the flyer at my website here (or have a look at the list below) and check out the great bargains to be had!

Last minute Christmas shopping? Deserve a little something special for yourself? Some products are 50% off!

I personally am planning on making a purchase or two - there is a stamp set on that list that I have been meaning to buy for some time, and it's only half price.

Just a warning, if you are planning on shopping with me for a Stampin' Up! Christmas, I would recommend getting your orders in early - I would imagine that the week before Christmas would be pretty busy and deliveries may be delayed.


Item

Page

Description

Retail Price

Sale Price

119181

39

A Little Treat Wood-Mount Stamp Set

$21.95

$10.98

120018

39

A Little Treat Clear-Mount Stamp Set

$15.95

$7.98

119189

40

Tote-Ally Tess Wood-Mount Stamp Set

$37.95

$26.57

111255

43

Daisy Dash Jumbo Stampin' Around Wheel

$15.95

$9.57

121482

56

Baby Bundle Wood-Mount Stamp Set

$49.95

$34.97

119161

72

Autumn Days Wood-Mount Stamp Set

$38.95

$19.48

120012

77

Pendant Park Clear-Mount Stamp Set

$27.95

$13.98

113031

88

Tart & Tangy Wood-Mount Stamp Set

$21.95

$15.37

115806

91

Fresh Cuts Wood-Mount Stamp Set

$38.95

$27.27

115946

102

Wonderful Favorites Wood-Mount Stamp Set

$39.95

$23.97

119167

104

Heard from the Heart Wood-Mount Stamp Set

$38.95

$23.37

119185

105

Teeny Tiny Sentiments Wood-Mount Stamp Set

$62.95

$31.48

105115

118

Pumpkin Pie Stampin' Write Marker

$5.75

$4.03

105106

119

Certainly Celery Stampin' Write Marker

$5.75

$3.45

100045

119

Pretty in Pink Stampin' Write Marker

$5.75

$3.45

105114

119

So Saffron Stampin' Write Marker

$5.75

$3.45

105111

119

Bashful Blue Stampin' Write Marker

$5.75

$3.45

105108

119

Regal Rose Stampin' Write Marker

$5.75

$3.45

105109

120

Bravo Burgundy Stampin' Write Marker

$5.75

$3.45

100069

120

Night of Navy Stampin' Write Marker

$5.75

$4.03

100082

121

Basic Black Stampin' Write Marker

$5.75

$3.45

103104

122

Small Cello Bags

$7.50

$4.50

111325

140

Styled Silver Hodgepodge Hardware

$57.95

$28.98

112530

140

Circle Scissor Plus

$54.95

$32.97

116681

161

Kind Heart Wood-Mount Stamp Set

$11.95

$5.98

Page numbers refer to the 2010-2011 Idea Book & Catalogue

Summer has arrived ...

... and Stampin' Up! have released their new Australian Summer Mini Catalogue, full of stampy goodness *g*. Items in this catalogue are available from December 1, 2010 through to March 31, 2011.

Click the link above to go straight to the online catalogue, then contact me to order your new goodies!

If you are planning on holding a workshop during this period, don't forget to check out the two new Hostess sets on pages 4 and 5 (a Level 1 set and a Level 2 set) - again, available only until March 31 next year.

There are also an assortment of the a la Carte stamps - single stamps, which come in their own little box (woodmounted only) and are an inexpensive item, great for gifts.

Another new product this time around are the Builder Wheel products, show on pages 14-15. These are narrow wheels which can be combined on a Jumbo handle to create your own customised look.

There's a whole bunch of other stuff - too much to go into here. You'll have to check it out for yourself.

If you want a hard copy of the Summer Mini, please drop me an email and I'll get one out to you.

Saturday, November 27, 2010

More Christmas cheer

As promised, here's a picture of the Christmas card that my lucky friends and family are going to receive this year.

Rather than think of a new design, I just based this on the card I made for my "real life job" employer to send out to our customers, with a couple of changes. First and most obvious (duh!) is the colours - I have gone for a more traditional red/green look, with a slightly vintage feel (using the vanilla and kraft).

This is a chance to showcase my new favourite colour, Cherry Cobbler ... so pretty ...!

I also used one of the little stamps in the Delightful Decorations sets for the Christmas message in the middle of the bauble, stamped in the new Crumb Cake ink which matches the cardstock formerly known as Kraft.

The one change you can't really see in this photo is the shimmer spray I've used on the vanilla layer. You put a few drops (about 10) of the new Shimmer Paint (page 143 in the 2010-11 Idea Book & Catalogue) in a little spray bottle, top it up with some rubbing alcohol (available in the health & beauty aisle in your supermarket), shake well before each use, and spritz your cardstock for beautiful shine. If it's not sparkly enough, you can respritz when it's dry.

Here's an exteme closeup, where you can actually see the flecks of paint (click for a closer view). If you could see the actual card, you would see that it has a glow about it, and really adds to the overall effect - I'm very happy with this year's efforts!

And you can expect to see a lot more shimmer in my cards - I love this Shimmer Paint!

Supplies used:
Stamp/s: Delightful Decorations
Ink: Cherry Cobbler
Cardstock: Crumb Cake, Cherry Cobbler, Very Vanilla, Old Olive
Other: Top Note Die, Vintage Wallpaper Embossing Folder, Little Leaves Sizzlit, Ornament Punch, 3/4" Circle Punch, Shimmer Paint

Wednesday, November 24, 2010

Christmas is coming ...

... and for a wonder, I'm organised (well, so far).

I have just this week finished the Christmas cards I make annually to send out to the customers of the company I work for - I like to think they appreciate the effort, and of course I am paid for my work and supplies!

This is the card that the lucky customers are getting this year.

I am loving this colour scheme - pick any purple, green and blue, and it just seems to work well together. Here I have used Baja Breeze, Concord Crush and Old Olive - not your traditional Christmas colours, but I like to mix things up a bit *g*.

And I found out something about the Little Leaves Sizzlit. Turns out that using it 120 times in a row makes it stick a little but it still cuts just fine!

Supplies used:
Stamp/s: Delightful Decorations
Ink: Concord Crush
Cardstock: Baja Breeze, Concord Crush, Whisper White, Old Olive
Other: Top Note Die, Vintage Wallpaper Embossing Folder, Little Leaves Sizzlit, Ornament Punch

Next time I'll show you the card that my lucky friends and family are getting this year. So if you're expecting a card from me, don't look :-)

Sunday, November 21, 2010

Final Project from Regional Seminar

This is the final project from the Stampin' Up! Melbourne Regional seminar last weekend. This one isn't technically finished, as I don't have a photo to put on the scrap page (yet), but it still looks pretty.

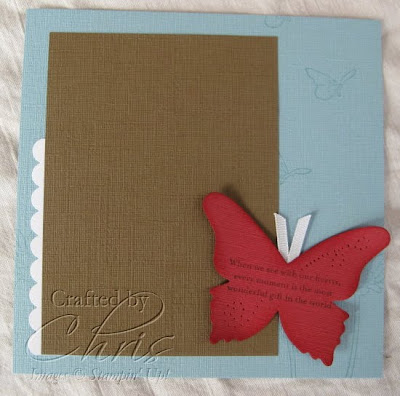
The butterfly is from the Beautiful Butterflies Bigz die for the Big Shot - love love love this die! The instructions called for us to stamp the greeting across the middle and sponge the edges, then using the Paper Piercing tool (now available as a separate item in the 2010-11 Idea Book & Catalogue, and only $6.95!) poke a series of holes in a sort of swirl across the whole thing. I like the effect, and hope to find other uses for it in the future.

And here's a closeup of the butterfly. See the antennae? It's just a piece of ribbon - simple yet effective.

Here's a tip for you: When you trim your ribbon, do you find the edges fray and look kind of nasty? Grab one of those gas guns for your gas cooktop (or a cigarette lighter), and hold the flame close to the cut edge of the ribbon (don't stick the ribbon in the flame - bad idea - hold it about 5mm away, and move it closer if necessary, and then only for a second or two). The cut edge of the ribbon will melt (it's only made of nylon, after all) and voila! No fraying problems!

Supplies used:
Stamp/s: Every Moment
Ink: Baja Breeze, Riding Hood Red, Soft Suede
Cardstock: Baja Breeze textured, Riding Hood Red textured, Soft Suede textured
Other: Whisper White 1/8" taffeta ribbon, Paper Piercing tool, Mat Pack, Scallop Edge Punch, Stamp-A-Ma-Jig

Saturday, November 20, 2010

:-( Christmas Promotion

I have received news from Stampin' Up! that there are quality issues with the Ornament Punches, and as such the "Delightful Decorations" bundle is no longer available for the current Christmas ribbon promotion.

If you were planning on ordering this punch, I'm afraid it will be unavailable for an unspecified amount of time as both Stampin' Up! and the manufacturers are working on a solution.

Thursday, November 18, 2010

Another Regional Seminar project

Third of four projects from the Stampin' Up! Melbourne Regional Seminar ... again using Every Moment, but this time the bird stamp from that set.

Here, while we used watercolouring techniques again, this one is done on Very Vanilla cardstock. The result is not quite as satisfactory as when the Watercolour Paper is used, but it can be done. You just need to use less water and be pretty sure about how heavy or light your colouring is, as you won't be able to wash colour away or add too many layers of colour.

The bag is made using Fancy Favour Bigz XL Die for the Big Shot - cut twice, once from Old Olive textured cardstock and once from Very Vanilla cardstock. The bottom is trimmed off the Very Vanilla template and the whole thing turned upside down to create a layered effect.

See the writing on the tag? Eagle-eyed viewers might recognise the text from the stamp in the set, but it looks a little different. Using a Stampin' Write marker and the Stamp-A-Ma-Jig, I inked only part of the first line of text and positioned it carefully for a new look.

And here's a closeup of my fabulous watercolouring - this is actually quite addictive *g*.

Supplies used:
Stamp/s: Every Moment
Ink: Baja Breeze, Old Olive, Riding Hood Red, Soft Suede, Black Stazon
Cardstock: Baja Breeze, Very Vanilla, Old Olive Textured
Other: Old Olive 5/8" grosgrain ribbon, Linen thread, Basic Pearls, Aqua Painter, 1-3/4" Circle Punch, Stamp-A-Ma-Jig, Chocolate Chip Stampin' Write Marker, Fancy Favor Bigz XL die, Cropadile

Tuesday, November 16, 2010

Regional Seminar Project #2

Further to my post from the other day, here's the second of the projects I completed after our Regional Seminar last weekend.

The photo might be a little dark (well, it looks that way on my computer screen, which is long past retirement age), so you may not be able to see the texture of the base Soft Suede cardstock.

Again, we used watercolouring on the daisy from the Every Moment set, and also masking to create a bunch of flowers.

When you're watercolouring, the best ink to use for your "colour in" image is Stazon - this is a permanent ink which, once dry, won't run when wet - perfect for this technique.

We also used the Colour Spritzer tool, which is fun - you put a Stampin' Write marker in the holder, squeeze the barrel and a puff of air blows colour from the marker tip onto your project. It takes a little practice to get it right, but the effect is quite interesting - a sort of light splatter of colour across your project.

Here's a closeup of my watercolouring - can you tell I'm pretty pleased with myself?

Supplies used:
Stamp/s: Every Moment
Ink: Daffodil Delight, Old Olive, Soft Suede, Jet Black Stazon
Cardstock: Old Olive, Very Vanilla, Soft Suede Textured, Watercolour Paper
Other: Old Olive 1/8" taffeta ribbon, Daffodil Delight 3/8" taffeta ribbon, Basic Pearls, Aqua Painter, Scallop Edge Punch, Clips Assortment, Soft Suede Stampin' Write Marker, Color Spritzer

Sunday, November 14, 2010

Regional Seminar

Yesterday was the day of the Melbourne Regional Seminar for Stampin' Up! demonstrators and guests. After the heat of the latter part of the week, then the downpour Friday night, it was nice to know we were going to spend the day snug in the new Melbourne Convention Centre, learning some new tricks and getting some business tips as well.

Amongst all the presentations and demonstrations, there is a little time to put together the make & take projects using the new stamp set that was included in our admission price. This year, the set was "Every Moment" from the current 2010-11 Idea Book & Catalogue. The designs of the projects this year were a little more involved than in past years, which meant that there was no chance of finishing them during the day (not that I have ever managed to achieve that LOL).

So today I sat down and finished off the contents of my make & take pack, and will share the results with you over the next week or so.

Here's the first one ...

The emphasis with these projects was on watercolouring, and the stamps in the set are perfect for this technique. The single flower on this little 3" x 3" card is watercoloured with Riding Hood Red, Daffodil Delight and Old Olive ink, with the colour intensifying where I have imagined the shadows on the flower to be.

See the "grass"? We did that by punching a scallop edge on a piece of Old Olive cardstock, then putting the card back in the punch a little offset to create a ragged edge.

The little pearl in the centre of the flower is from the new Basic Pearls pack, a selection of self-adhesive half-pearls in various sizes. You get a whopping 150 in a pack, 50 each of three sizes (5mm, 3mm - shown here) and 2mm.

Click the picture to the right to see a closeup of the centre of the flower.

The instructions called for the use of the SU White Gel Pen to create highlights on the petals, but mine suffered death from natural causes the other week (yep, too much use).

Supplies used:
Stamp/s: Every Moment
Ink: Daffodil Delight, Old Olive, Riding Hood Red, Black Stazon
Cardstock: Old Olive, Baja Breeze Textured, Watercolour Paper
Other: Old Olive 1/8" taffeta ribbon, Basic Pearls, Aqua Painter, Scallop Edge Punch, 1-3/4" Circle Punch, Stamp-A-Ma-Jig, Chocolate Chip Stampin' Write Marker

Monday, November 1, 2010

I'm still here!

Just been busy with non-stamping stuff lately. Although I have made a start on my my annual commission of 100 cards for my employer to send out to our customers (I get paid for that, by the way). Take a look here, here and here for past years' efforts.

I will be posting a picture of some of the cards in the next day or so. So far I've done 33, only 67 to go! And then I have to make my personal cards. Sigh. Fortunately I receive lovely feedback from recipients, which makes all the work worthwhile.

Don't forget to check out the current special (or try this link, which includes a small picture of the Christmas Cocoa specialty paper), by the way - buy one (or more) of the four bundles on offer and receive a free spool of festive ribbon!

Monday, October 18, 2010

Wrap up Christmas with exclusive ribbon


Between October 16 and November 30, you can order one of the following bundles and receive a FREE spool of exclusive Stampin' Up! ribbon.
  • The Gifted Bundle: Gifted Stamp Set and Jolly Holiday Designer Series Paper. Wood Mount Price $66.90 or Clear Mount price 56.90
  • The Welcome Christmas Bundle: Welcome Christmas Set and Christmas Cocoa Specialty Designer Series Paper. Wood Mount price $69.90 or Clear Mount price $59.90
  • The Season of Joy Bundle: Season of Joy Set and So Swirly Stampin' Around Wheel. Wood Mount only, price $67.90
  • The Delightful Decorations Bundle: Delightful Decorations Set and Ornament Punch. Wood Mount only, price $72.90
Choose from one of the following ribbons (only available with this promotion):
  • Mistletoe Ribbon Originals (retail value $21.95)
  • Sleigh Bells Ribbon (retail value $15.95)
  • Riding Hood Red 1-1/4" Striped Grosgrain Ribbon (retail value $19.95)
  • Real Red 3/4" Polka Dot Grosgrain Ribbon (retail value $19.95)
Note that bundles and ribbons are only available while stocks last.

You can also earn a free spool of ribbon if you host a $550 (or more) workshop.

Wouldn't you know I just bought Delightful Decorations and the matching punch? If I'd waited two weeks I could have got myself some free ribbon too *sigh*.

Contact me to place your order today!

Additional Notes:

Before you start looking in the catalogue for Christmas Cocoa Specialty Paper, it's not there. It was apparently in a recent US Mini Catalogue. All I know is it's pretty, in shades of Real Red and Soft Suede, and apparently has a flocked surface (ooooh).

The Mistletoe Ribbon Originals is two ribbons, approx 8 yards of each in a 3/8" Old Olive taffeta and a 1/2" White Grosgrain double stitched with Real Red.

Saturday, October 16, 2010

In Colors 2010-12

As you are probably aware, Stampin' Up! have changed the In Color timetable ... now we have five new colours, but they will be available for two years. Next year, another five new colours will be introduced, also available for two years. So there will always be ten In Colors, with half being replaced each year.

Confused yet?

Just sit back and enjoy this combination of some of the new crop of colours - Pear Pizzazz, Peach Parfait and Poppy Parade - inspired by this post from the talented Lyssa.

And remember, these colours are available until August 2012. Yay!

Supplies used:
Stamp/s: Printed Petals, Hello Again
Ink: Poppy Parade, Pear Pizzazz, Peach Parfaito
Cardstock: Pear Pizzazz, Poppy Parade, Peach Parfait, Whisper White
Other: 1-1/4" Circle Punch, 1-3/8" Circle Punch

Thursday, October 14, 2010

Birthday Butterflies

More birthday cards, this time for my sister-in-law. I'm still loving the colour combination here and had a few butterflies left over from that cutting session, so I turned the whole thing around and made this.

Happy birthday, Sophie!

Supplies used:
Stamp/s: Perfect Punches
Ink: Rich Razzleberry
Cardstock: Rich Razzleberry, Whisper White, Pear Pizzazz, Daffodil Delight, Melon Mambo
Other: Beautiful Wings Embosslit, Elegant Lines embossing folder, Perfect Polka Dots embossing folder, Top Note Die

Tuesday, October 12, 2010

Inspired...

I had some birthday cards to make the other night (hopefully they have reached their destinations by now!) and needed some inspiration to get me started. Of course, Splitcoast Stampers obliged, and this card in particular caught my eye. Something about the layout appealed to me, so I sat down to make my own interpretation.

I really like how this came out (hope Lisa likes it also). And I finally got a chance to use my new Crumb Cake inkpad - love it!

Oh, and the blue butterfly - aside from being cute and lifting out the centre of the card, it has an actual purpose in hiding a small smudge :-)

Supplies used:
Stamp/s: Upsy Daisy
Ink: Crumb Cake, Early Espresso
Cardstock: Pacific Point, Very Vanilla, Crumb Cake
Other: Top Note Die, Circle Cutter, Elegant Lines embossing Folder, Beautiful Wings Embosslit

Monday, October 4, 2010

Watercolour Rose

As you may know, Stampin' Up! Classic Inks are dye based, which means that they will run when wet. Usually you try to keep your work dry and avoid this, but sometimes it can be exactly what you need for your project.

Here, for example, I have stamped the big rose from Fifth Avenue Floral onto watercolour paper which was sprayed with water beforehand. The Regal Rose ink immediately bled out across the paper. Once the piece was dry, I used my Stamp A Ma Jig to restamp the flower in Regal Rose and create this simple yet effective focal point for my card.

Layer it with a few pieces of coordinating cardstock (in this case, more Regal Rose along with Soft Suede and Very Vanilla) and you have this ... I am very happy with the result!

Supplies used:
Stamp/s: Fifth Avenue Floral, Trendy Trees
Ink: Regal Rose, Soft Suede
Cardstock: Regal Rose, Very Vanilla, Soft Suede, Watercolour Paper
Other: Word Window Punch, Designer Label Punch, 1-3/8" Circle Punch, Cutter Kit, Stamp A Ma Jig

Saturday, October 2, 2010

Too Cute!

Okay, so now we've all seen the Owl Punch - and he really is too cute.

I finally made a card incorporating my little penguin - the icebergs are made with Stampin' Up!'s vellum cardstock, glued over a piece of Baja Breeze card which I tore and sponged to look a little like the sea. He needs a greeting, but that is something I will add when I decide who he's being posted to.

Supplies used:Cardstock: Basic Black, Whisper White, Peach Parfait, Baja Breeze, Vellum Cardstock
Other: Two Step Owl Punch

Thursday, September 30, 2010

Birthday Owl

I finally got around to using the little owl I made the other day, turning him into a cute birthday greeting. I used the Two Step Bird Punch for the branch, otherwise he would have been floating in mid air. Of course, this means the branch is floating ... now I'm overthinking things LOL. If it was truly realistic, the owl's heart would be on the inside, for a start.

This is a card the guests at a recent workshop made, with personal variations of course.

Supplies used:
Stamp/s: Perfect Punches
Ink: Early Espresso
Cardstock: Old Olive, Daffodil Delight, Early Espresso, Very Vanilla, Peach Parfait, Poppy Parade
Other: Two Step Owl Punch, Two Step Bird Punch, Top Note Die, Perfect Polka Dots Embossing Folder

Tuesday, September 28, 2010

Simple and Stunning

This card is directly inspired by a swap I received at our Stampin' Up! Convention in Canberra last year. The original was created by Nikki Stalker, and has been sitting at the back of my mind as something I would like to create for all this time.

This is my version, using some updated colours. I love the combination of Rich Razzleberry and Baja Breeze, with a little Daffodil Delight thrown in.

Looking at it now, I see that I could have used Pear Pizzazz instead of Daffodil Delight and kept with the purple/blue/green theme from the other day *g*.

Sunday, September 26, 2010

Fun Colour Combination

Did you know that purple, blue and green could look so good together? Well, they do when you use these particular shades, anyway.

Here I have combined two new In Colors, Concord Crush and Pear Pizzazz with an old faithful, Bashful Blue. It's kind of hard to see the Concord Crush properly - it is a dark blue-purple colour, very rich, and one I hope to use a lot over the next two years.

Supplies used:
Stamp/s: Cottage Garden, Trendy Trees
Ink: Concord Crush, Pear Pizzazz, Bashful Blue
Cardstock: Bashful Blue, Concord Crush, Pear Pizzazz
Other: Crimper, 1-3/4" x 7/8" Oval Punch (formerly known as Large Oval), Word Window Punch

Saturday, September 25, 2010

My new favourite colour *happy sigh*

No photograph can do justice to the beauty of this colour. Cherry Cobbler, one of the new core colours, is a deep, rich, velvety red - almost a burgundy - and just blows me away every time I see it. The picture here just doesn't show its true beauty *sigh*.

Supplies used:
Stamp/s: Medallion, Trendy Trees
Ink: Cherry Cobbler
Cardstock: Basic Black, Very Vanilla, Cherry Cobbler
Other: Very Vanilla 1/4" Grosgrain Ribbon, 1-3/4" x 7/8" Oval Punch (formerly known as Large Oval), Scallop Oval Punch

Sunday, September 19, 2010

Beautiful Butterflies

Some more new goodies, and no stamping in sight!

Amongst other things in the 2010-11 Idea Book & Catalogue, we have a range of new Big Shot dies and accessories to play with, some of which are shown here.

The butterflies are cut and embossed using the Beautiful Wings Embosslit die - this nifty little gadget will cut your shape and emboss it at the same time. The die comes with five different sized butterflies - the largest, shown here, is 4.7cm across the widest point of the wings.

Beneath the butterflies, I have used something else new - the Elegant Lines embossing folders.

And if you have a very keen eye, you will see two new colours on this card - Daffodil Delight, one of the new core colours, a lovely sunny yellow as you can see; and Pear Pizzazz, a new In Color, which is similar to Certainly Celery, but a shade or two darker.

Supplies used:
Cardstock: Rich Razzleberry, Whisper White, Pear Pizzazz, Daffodil Delight, Melon Mambo
Other: Beautiful Wings Embosslit, Elegant Lines embossing folder

Friday, September 17, 2010

OMG! Owl Punch!

One of the first things I *had* to have from the new 2010-11 Idea Book & Catalogue was the Two Step Owl Punch (page 146). The punch itself doesn't look like much, but once you do a bit of creative punching and gluing, you get this little guy - how adorable is this?

He's only little, too - a hair under 3.5cm from the top of his head to his butt (not counting ears or feet).

It's hard to tell from the picture, but the owl contains a few new colours - his body is made using the new Early Espresso core colour, a dark, dark brown; the heart is in the new In Color Poppy Parade - a clear bright red, almost a vermillion; and the eyes are another In Color, Peach Parfait, which is kind of like a lighter version of Pumpkin Pie.

Supplies used:Cardstock: Early Espresso, Very Vanilla, Peach Parfait, Poppy ParadeOther: Two Step Owl Punch

And here's a variation, which isn't an original idea at all - but it's so darned cute and easy I had to make one. The beak is made from the heart included in the punch, with the eyes glued over the top. This one has a bit of an odd look - those little black pupils are super small and kind of tricky to glue on!

Supplies used:Cardstock: Basic Black, Whisper White, Peach Parfait
Other: Two Step Owl Punch

Sunday, September 12, 2010

Simple Card

Here's something a made a while back, but never quite got around to photographing for the blog. It was super quick and easy to make, I have to say.

The flowers are just punched out of Pretty in Pink and Melon Mambo cardstock and layerd onto the branches of the little stamp from Pocket Silhouettes. I have also used the same stamp a couple of times at the bottom left of the base card and the pink layer to add some interest there.

Images © 1990-2010 Stampin' Up!®

Supplies used:
Stamp/s: Pocket Silhouettes
Ink: Pretty in Pink, Soft Suede
Cardstock: Soft Suede, Pretty in Pink, Very Vanilla
Other: Pretty in Pink 1/4" Grosgrain Ribbon, Boho Blossoms Punch, Metallic Brads

Friday, September 10, 2010

More Old Favourites

Recently I posted about rediscovering an old favourite stamp set, Always. I had a ball making new cards with the set, trying out this and that to see what worked. Here's one from that session I didn't get around to posting.

Usually I will use pinks and warm colours with this particular stamp, but I wanted to break away from that - managed pretty well here, I think *g*!

Images © 1990-2010 Stampin' Up!®

Supplies used:
Stamp/s: Always
Ink: Pacific Point

Cardstock: Pacific Point, Whisper White
Other: Perfect Polka Dots embossing folder

Wednesday, September 8, 2010

Upsy Daisy

Still lovin' this stamp set. See how versatile it is? It can be vibrant and colourful. It can be coloured with markers before stamping (hmmm, I don't seem to have a sample of that - better fix this situation soon *g*). It can be dramatic. Or it can be simple, as shown here.

All I've done is stamped the flowers twice in Versamark, embossed in white and layered onto Night of Navy and Crumb Cake.

Love how it came out!

mages © 1990-2010 Stampin' Up!®

Supplies used:
Stamp/s: Upsy Daisy
Ink: Versamark

Cardstock: Crumb Cake, Night of Navy

Other: White Stampin' Emboss Powder

Monday, September 6, 2010

Returning Favourites

If you've had a chance to flick through your copy of the new Idea Book & Catalogue, or checked it out online, you might see that some of the stamp sets are a little familiar.

This time around, we have a number of sets returning from the previous year's Mini Catalogues, including this one, which I love.

It's called I {heart} Hearts, and consists of ... well, hearts. Ten of them to be exact (three are on the one stamp, and coordinate with the Heart ot Heart punch). You can see some stuff I made with this set earlier this year by clicking this link.

Couldn't help myself, I added a touch of embossing to the lower part of the card - did I mention how much I LOVE my Big Shot?

mages © 1990-2010 Stampin' Up!®

Supplies used:
Stamp/s: I {Heart} Hearts
Ink: Regal Rose, Chocolate Chip, Pumpkin Pie

Cardstock: Chocolate Chip, Regal Rose, Whisper White

Other: Vintage Wallpaper Embossing Folder, Stamp-A-Ma-Jig

Saturday, September 4, 2010

Still waiting *sigh*

So I have placed my first order from the NEW Stampin' Up! Idea Book & Catalogue, and of course I want it right now, if not sooner. Unfortunately, it has to be picked, shipped and delivered before I can play with my new goodies.

In the meantime, here's a card I made, again using the new catalogue as inspiration - the original is on page 74, if you happen to have yours handy.

These cute little stamps are from Printed Petals - a set we received as part of our convention experience back in May. Stampin' Up! policy doesn't allow us to post samples of stamps on the web unless they're available either as a pre-order or for general sale, so I have had to keep this set under wraps all this time, which has been a little hard this past month, I can tell you!

As I didn't have ribbon to match the Chocolate Chip base (*sniff* now that Chocolate Chip ribbon is retired, *sob*) (can't wait to get hold of the new Early Espresso ribbon, though!) I crimped a piece of matching cardstock to attach instead - I really like the tone-on-tone look.

Supplies used:
Stamp/s: Printed Petals
Ink: So Saffron, Bashful Blue, Pretty in Pink
Cardstock: Chocolate Chip, Whisper White, So Saffron, Bashful Blue, Pretty in Pink

Other: Crimper, 1/2" Circle Punch

Wednesday, September 1, 2010

It's here! It's here!

At long last, Stampin' Up! is proud to announce the arrival of the new 2010-11 catalogue in all its glory.

You can have a look at the new (and returning) products available on the Stampin' Up! website - just click on the main picture on the site to be taken to the new catalogue page or click here to go directly there.

You can view the catalogue online, or download a PDF of the whole thing directly from the website.

Or, of course, contact me for a hard copy of your own *g* ... remember, it's free if you host a workshop!

For those of you who are "serious" collectors, Stampin' Up! have made available several new "colour kits" to update your current stash of cardstock, ink, pastels, markers and watercolour crayons with the new core colours (Daffodil Delight, Cajun Craze, Cherry Cobbler, Marina Mist, Early Espresso and Crumb Cake - formerly Kraft) and the new In Colours (Blushing Bride, Concorde Crush, Pear Pizzazz, Peach Parfait and Poppy Parade) - check out the flyer on the new catalogue page.

I have already placed my first order, so hopefully I will have some new stuff to show you over the next week or so.

Sunday, August 29, 2010

More remade samples

I have been stamping up a storm recently (you've probably noticed all the posts *g*) in my quest to restock my samples folder.

Here's a card I remade, using this one as a template. As you can see, I pretty much stuck with the formula, and am very happy with the result.

The stronger colours work particularly well here, I think - Riding Hood Red is one of my new favourites lately!

Supplies used:
Stamp/s: Trendy Trees
Ink: Not Quite Navy, Riding Hood Red, So Saffron
, Soft Suede
Cardstock: So Saffron, Riding Hood Red, Whi
sper White
Other: Funky Forsest Stampin' Around Standard Wheel, Stampamajig, Stampin' Around Wheel Guide

Friday, August 27, 2010

Another catalogue CASE

Not too long to go now before the new 2010-11 Ideas Book & Catalogue goes live ... contact me to arrange your copy.

In the meantime, here's a card I made which was inspired by a sample in the new catalogue (which, by the way, is an awesome source of inspiration - which is why they call it an "Ideas Book" as well as a "Catalogue").

The original was much nicer, mostly because I looked at the catalogue, liked the card, waited a few days and then tried to copy it without bothering to look again. You'll see what I mean when you get your copy LOL.

Anway, it was an interesting experiment, and a chance to play with my new crimper (which I resisted buying for the longest time, and yet now can't imagine how I managed to live without it).

Images © 1990-2010 Stampin' Up!®

Supplies used:
Stamp/s: Upsy Daisy
Ink: Soft Suede

Cardstock: Soft Suede, Whisper White, Baja Breeze, So Saffron, Regal Rose, Old Olive

Other: Crimper

Thursday, August 26, 2010

Price Reductions on Last Chance List

As the Last Chance List enters its final days, Stampin' Up! have discounted selected products ... check it out here to see what you can pick up at bargain prices!

I have highlighted the newly discounted products in green on the list so you can see quickly which are at the new reduced prices.

To summarise, there are a few stamp sets, the In Color cardstock pack, marker packs, Stampin' Spots, some Designer Series Paper and a selection of punches on the list, at up to 50% off the original price. Take a look and see if anything is on your wishlist before it's all gone!

Wednesday, August 25, 2010

As promised...

The other day I showed you a hint of Vintage Wallpaper - a new embossing folder for your Big Shot. The folder will be available for purchase from September 1 from the new 2010-11 Ideas Book & Catalogue.

Here is another card using this folder, which shows a little more detail. Not a great deal, mind, as it's largely hidden behind the front panel, but you can probably get the idea.

The Stampin' Up! folders are sized to cover (most of) a card front. I personally prefer to use them for layering, but that's just me. And they're reasonably priced - so much so that I am probably going to get another one of these to experiment with (wait and see!).

The card itself was just the result of a table full of stuff, the stamp set "Always" sitting nearby, and a desire to try making something that wasn't pink out of this set. I won!

Images © 1990-2010 Stampin' Up!®

Supplies used:
Stamp/s: Always, Baroque Motifs
Ink: Not Quite Navy, Sahara Sand
Cardstock: Sahara Sand, Not Quite Navy, Very Vanilla
Other: Vintage Wallpaper embossing folder

Monday, August 23, 2010

New Stamp Set ...


So far I haven't really been showing you much new stuff ... I have to admit this is partly because I didn't buy much from our demonstrator-only pre-order (saving my money for next month when the new catalogue is officially released *g*).

However, I do have access to one or two new goodies. As a f'rinstance, this is a stamp from a new set called "Perfect Punches", which all attendees were given (yes, *given*) at the annual Stampin' Up! Convention in May (no one was expecting it; we were all totally blown away by this).

Each stamp in the set of 6 coordinates with a Stampin' Up! punch, and contains a variety of handy phrases such as the "happy birthday" shown here, "Joy at Christmas", "Thanks", "Congratulations" and "my friend".

The card shown here was inspired by a (poorly remembered) sample from the catalogue - I saw it, liked it and tried to replicate it, but then when I saw the original I was astonished that I'd managed to get it so wrong LOL. The sample is much, much nicer, and I will try it again sometime soon.

The more observant of my readers will no doubt already have noticed the other new element on this card ... yup, a new embossing folder to add to my repertoire. This one is called Vintage Wallpaper, and is just lovely. I will show another card featuring a larger sample in a day or two.

Images © 1990-2010 Stampin' Up!®

Supplies used:
Stamp/s: Perfect Punches (new set!), Inspired by Nature, Trendy Trees
Ink: Soft Suede, Bashful Blue, Pretty in Pink
Cardstock: Soft Suede, Bashful Blue, Pretty in Pink, Certainly Celery, Whisper White
Other: Wide Oval Punch, Vintage Wallpaper embossing folder, Perfect Polka dots embossing folder, Crimper

Saturday, August 21, 2010

CASEing a CASE...

A couple of years ago, I borrowed a card style from a Stampin' Up! mini catalogue ... the other night I revisited the layout with updated colours to see what would happen.

I like it *g*.

The colours here were inspired by a Designer Series Paper set from the upcoming 2010-11 Catalogue (contact me to reserve your copy *g*) - the combination of Very Vanilla, Basic Black and Riding Hood Red is very rich and yet very simple.

Images © 1990-2010 Stampin' Up!®

Supplies used:
Stamp/s: Always
Ink: Riding Hood Red

Cardstock: Very Vanilla, Basic Black, Riding Hood Red

Other: Very Vanilla 1/4" Grosgrain Ribbon

Thursday, August 19, 2010

New Catalogue Sneak Preview

I got a package today ... a very big package *g*. So do you want to see what was inside?

Really?

Scroll down

.
.
.
.
.
.
.

Scroll a bit further

.
.
.
.
.
.
.

A little more ...

.
.
.
.
.
.
.

Okay, so I'm not actually allowed to show you what was inside the three smaller boxes that were inside the really big box :-(

Sorry to get your hopes up LOL

However, I am allowed to distribute these new catalogues. They're only $10 each, or FREE if you host a workshop *g*.

Two of these boxes are actually destined for Paperific, being held next weekend (August 27-29) - you can always buy one from us at the Stampin' Up! stand there, or contact me to purchase a copy early.

And because I'm sorry I can't show you the catalogue, here is something made with a BRAND NEW stamp set!!!

The stamp shown here is from a new Level 2 Hostess Set called "Cute By The Inch" ... it is a set of 9 little square stamps which are actually slightly smaller than 1", designed to fit in a NEW Petal Card XL Double Punch (which unfortunately wasn't part of the pre-order, so I have to wait to get my hands on it *sniff*).

I took inspiration for this quick and simple card from this card - love the colour combination and clean lines.

Images © 1990-2010 Stampin' Up!®

Supplies used:
Stamp/s: Cute by the Inch (Level 2 Hostess Set)
Ink: Basic Black
Cardstock: Kraft (soon to be renamed Crumb Cake), Basic Black, Old Olive, Melon Mambo, Tempting Turquoise
Other: 1-1/4" Square Punch, Scallop Square Punch

LinkWithin

Related Posts with Thumbnails